This short tutorial will explain and describe how to
- create and edit models, and
- perform basic refinement and compatibility checks.
It is assumed that you have successfully installed the MIO Workbench, as described in the installation instructions. Basic knowledge of the Eclipse workbench are not mandatory for this tutorial, but can help to feel comfortable in the MIO Workbench.
In this tutorial, we will specify a client component, sending a message, and waiting for a positive response, but does not allow to receive a negative response.
- First, select the standard perspective of the MIO Workbench by selecting Window > Open Perspective > Other… and select the MIO Workbench perspective. You should now have a similar layout as seen below.
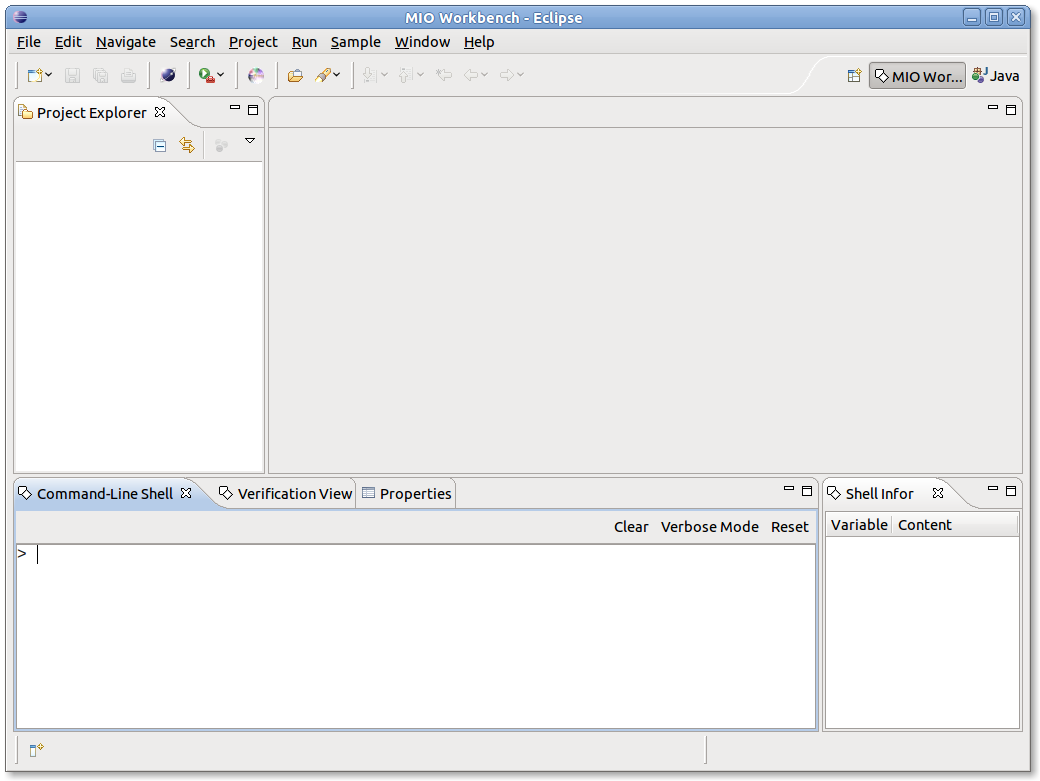
- We start by creating the model for the client. First, we need to create a project. Click on File > New > Project > General > Project. In the next dialog, provide a name for the project, for instance “Tutorial 1″.
- Let’s create our first MIO in our project. Click on File > New > Other > Modal Input/Output (MIO) Automata and call it “Client.mio”. Double click on the created file (in the project explorer), then the editor should open your the MIO.
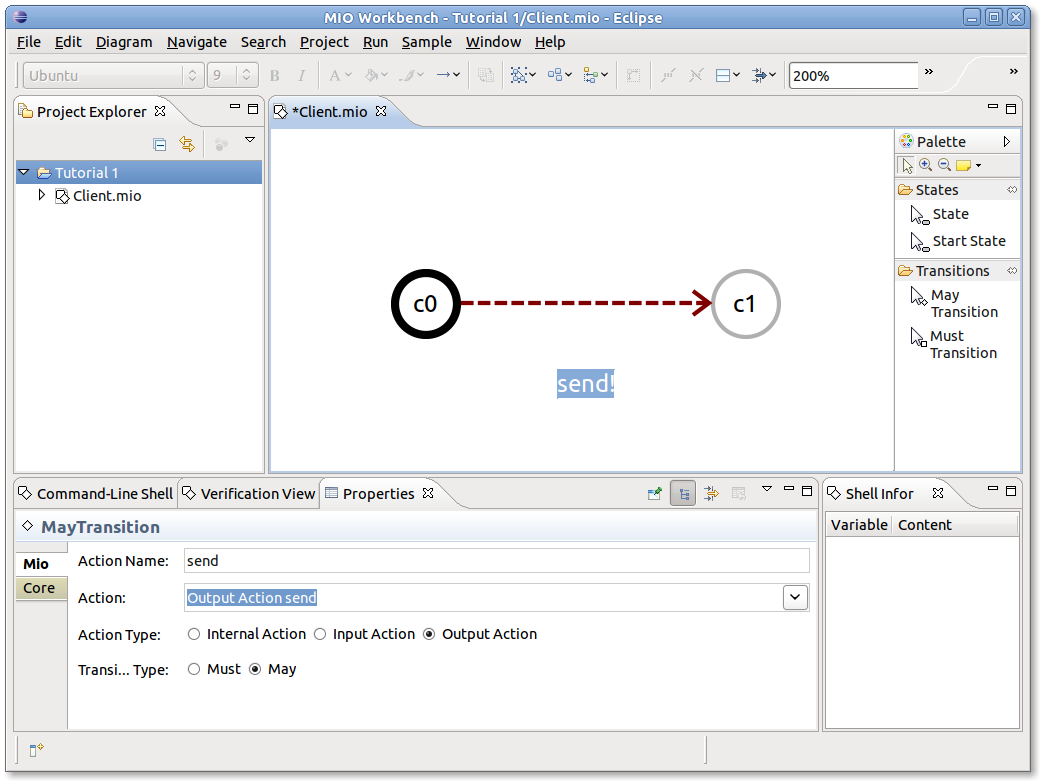
- Create a start state by first selecting “Start State” in the Palette of the editor and then click somewhere in the editor main frame. The editor will immediately ask you to enter a name, enter “c0″. Create a second state “c1″, this time using “State” of the Palette. The start state is always indicated by a thick black circle, normal states are with a thin gray circle. You should have now a MIO with just two states.
- Click on may transition in the Palette and click on the initial state “c0″ and drag the transition to “c1″. After creating a transition you are always asked for the action name of the transition. Enter the label “send” for the action of our newly created may transition. The MIO can be configured in detail in the properties view (a tab in the lower group of views, next to verification view). You can select states, transitions and actions, and the properties view will display its properties. To show the properties of the whole MIO (for instance, the set of actions) just click somewhere in the editor to deselect any entities.
- Let’s change the action “send” to an output, by selecting the transition (or action) in the editor and declare it as an output action in the properties view.
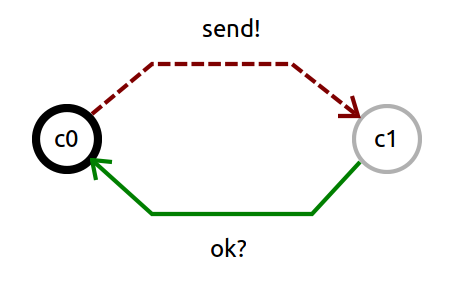
- Create another transition, this time a must transition, between state “c1″ and “c0″, with input action “ok”. You can re-layout the transitions of your MIO manually by creating bendpoints: dragging the transition creates bendpoints which can be removed by dragging them on the source or target state of the transition.
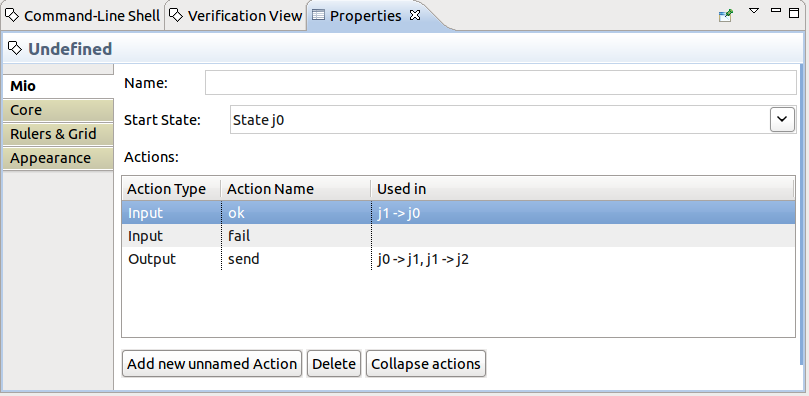
- Now we want to adapt the alphabet of the MIO, because the input action “fail” should belong to the set of actions although there is no transition enabled for it (thus the client is not allowed to perform “fail” in any state). Deselect all elements in the editor, then you should see the properties of the MIO in the properties view. Click on “Add new unnamed Action” and declare it as an input action with label “fail”. The properties should look like in Figure 4 below.
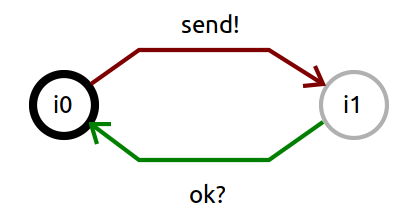
- This finishes the MIO specifying the client. Save it, and create two new MIOs, “ClientImpl1.mio”, and “ClientImpl2.mio”, with the same set of actions, and with the transitions as shown below.
- Make sure that ClientImpl2 has exactly the set of actions {send!, fail!, ok?}. If you create a transition (e.g. the second send transition) it will always create a new action, even if you enter an existing label. In order to remove duplicates, go to the properties of the MIO and select “Collapse Actions”.
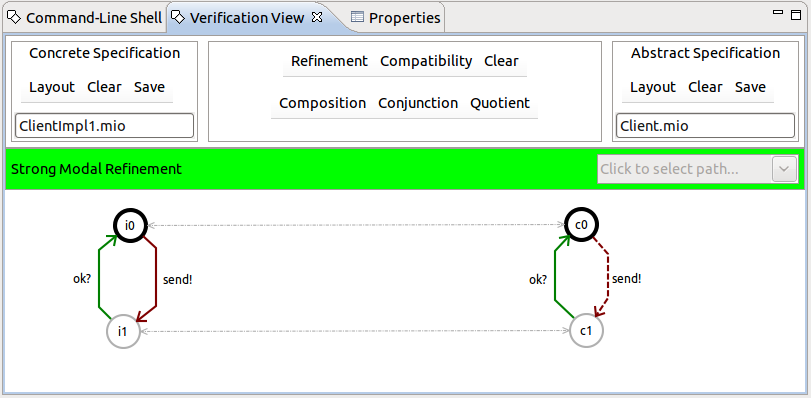
- Let us check whether ClientImpl1 and ClientImpl2 are indeed refinements of Client. Select the verification view and drag Client from the project explorer and drop it on the right hand side of the verification view. Drag-and-drop ClientImpl1 on the left hand side. Then press Refinement > Strong Modal Refinement in the middle panel of the verification view. The MIO Workbench signals with a green bar that refinement holds, and a witnessing refinement relation is indicated by gray arrows showing which states are related.
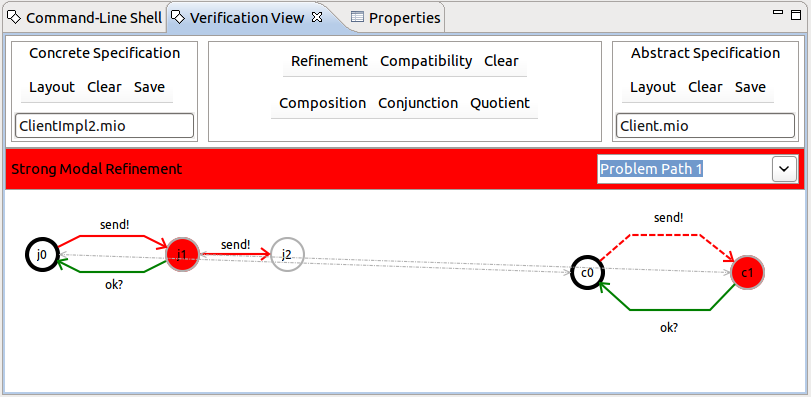
- Let us check now whether ClientImpl2 refines Client. Drag both MIOs in the verification view, ClientImpl2 on the left hand side, Client on the right hand side. Select Refinement > Strong Modal Refinement and the MIO Workbench signals with a red bar that ClientImpl2 does not refine Client. Obviously, the problem is that in state “j1″, which is necessarily related to state “c1″, the “send!”-transition is not allowed in state “c1″. The problematic transitions are marked in red.
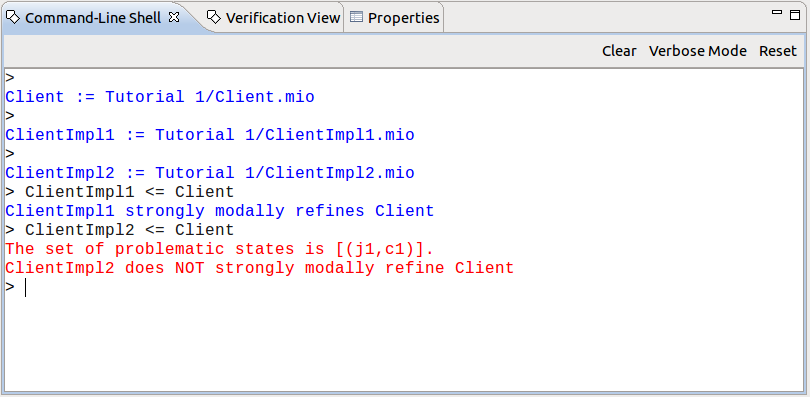
- The last part of this introductory tutorial is the basic usage of the command-line shell. Drag (one after another) Client.mio, ClientImpl1.mio, and ClientImpl2.mio from the project explorer and drop them on the command-line shell view. You are asked for a name to be used in the shell; it is recommended to use the file name to avoid confusion (the declared variables are also monitored in the small view “Shell Information” in the lower right corner. Once all three MIOs are registered in the shell, you can execute the following commands as shown in the figure below.
- For more information on the command-line shell please see this page.
- This finished the tutorial. You have seen the very basic first steps of creating MIOs and verifying them either with the verification view or the command-line shell.


Comments are closed.